How to Create a Form in 5 Minutes

Want to create a form for your website, but don’t know where to start? Even if you’ve never tried making one, you’ve seen them online: contact and order forms, surveys, feedback requests, job applications, and many more. That’s all you need to create web forms online with AidaForm.

Build forms that engage visitors and learn more about them, create a loyal customer base, improve your business based on feedback and accept payments online. AidaForm lets you have the creative freedom with form making and takes care of the technicalities automatically.

In this tutorial, you’ll learn about the most common types of forms that you might need and how to make forms for your website easily without learning PHP or HTML coding.

Build Your Form Build Your Form Build Your Form

5 Steps How to Make Any Form for Your Website

1

Decide What Form Type You Need

Before you can compose your form, you need to know what you’re going to use it for. Do you want visitors to contact you? Leave feedback? Make payments? Submit applications? Answer these questions first and see if there is a common form type that fits your needs.

Here are the four most used form types. You can build any of them and many more from the elements available in AidaForm. You can also take a look at the AidaForm form template gallery below and find a template that suits your needs best.

Contact / Inquiry
This is the most common way for your visitors to get in touch with you. The fewer fields this form has, the better. Ideally, you should get the respondent’s name, an email to contact them and make sure they can leave a freeform message in a text area. Include a subject or problem selection if you already know why a person may contact you – it’ll make processing easier.

Survey
Surveys can be used to evaluate customer satisfaction, learn more about your visitors, or simply entertain them. Use multiple choice questions, rating gauges, drop-down lists, and freeform questions to find out what visitors think about your service and website.

Registration
Want your visitors to register for a charity or sports event you’re holding? Collect registrations through a specialized web form: use dedicated fields for name, email, position, add a text area for special requests and comments, include file upload function for any documents you may need to complete the registration.

Job Application
Expanding your business is easier if you have job offers on your website. Collect and sort job applications through a web form: include a drop-down list for available positions, name and email fields, let applicants include links to their portfolios and upload CVs in the DOCX or PDF format.

Now that you know what kind of form you want, let’s learn how to create an online form with the AidaForm service.

2

Log in to AidaForm

Click Log In in the top menu of any page at AidaForm. Sign in using your email and password if you already have an account or sign up if you don’t have one yet. The registration is free and you can make a form without switching to a paid plan, too!
3

Select and Customize the Template

In the main window of your member’s area, click Create a Form and choose the template you want to start with. Go for the Blank template to add only the fields you need or save time with a Basic template that has the most common fields like Name or Email already included. You’ll be able to add more fields for your specific form type in the Form Editor.

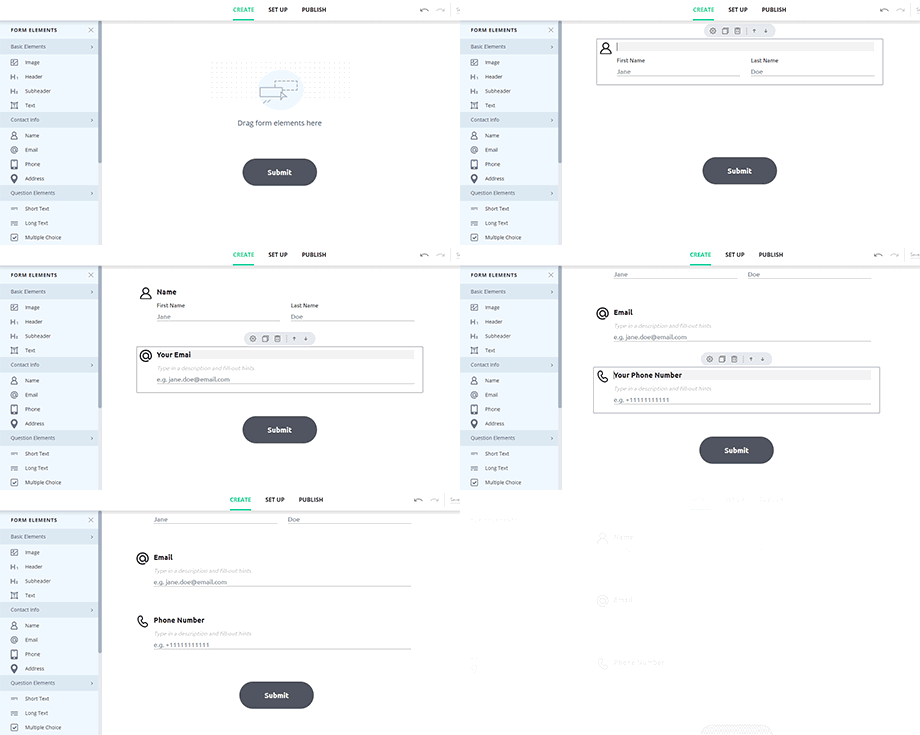
The Form Editor has a wide selection of pre-designed responsive blocks with content validation: phone, email, text areas, multiple choice questions, file upload, and more. You don’t need to learn how to make a form from scratch – just combine the blocks relevant for your form type and adjust their content in block settings.

Once you’re done composing your form, add your logo and use the Form Designer to adjust the design of the form.

All changes you make to the template are saved automatically – nothing gets lost even if your internet connection breaks midway.

4

Configure Payment Collection (Optional)

If you need a form to collect donations or accept payments for orders and event registration, you can do so by integrating AidaForm with your PayPal account.

In the Builder tab, find the PayPal Payment block and drag it to your form. You can set a fixed amount to be charged, or let the user select any desired amount when they fill out the form.

Go to the Settings tab of the PayPal Field and connect your account to the AidaForm service. When respondents submit payments through your form, they’ll be redirected to PayPal to complete their transaction.

5

Use the Form on Your Website

Looks good? Click Publish to generate a direct link to the form page automatically. Now that you know how to build a form – let’s add it to your website.

You can make the form available on your website by adding the form link to a button (for example, a Contact Us button). You won’t need to set up response collection or any additional integrations – AidaForm takes care of that automatically. You’ll get notifications about each submission per email. Plus, you can view all form responses in your account.

This is all you need to create simple web forms with AidaForm – try it out right away.

Request a Form for Free